当エントリはDockerの基本中の基本を学ぶ為、『ドットインストール』で紹介されている講座の1つである『Docker入門』の全11回の内容について学習・実践してみた内容となっています。まず初めに『Dockerとは何ぞや?』というところから把握するにはこの辺りから始めるのが良さそうと思いまして、現時点の状況でこの講座学習を進めて行った際の手順等を学習記録として残しておこうと思います。
- 前提・背景
- 学習記録
- まとめ
前提・背景
- 元々はAWS Batchについての興味関心からでした。
- AWS Batchではコンテナイメージを使って処理を実行させる事も可能になっています。
- 個人的にはDockerを含めたコンテナ技術周りには疎かった為、これを機に本格的に取り組んでみようと思った次第です。
- 当講座ではUbuntuをOSとして用意し、その中にVagrantを準備しDockerをインストールするという手順で進めています。
- 今回実践している環境はMac(OS:Sierra)。なのでMac上にVargantとVirtual Boxを導入し、仮想環境としてUbuntuを用意する方向で進めます。
- なお、2017年現在では『Docker on Mac』なるものも出て来ており、最初からこっち使えば良いじゃんという気もするが、Dockerの使い方を学ぶという事でまずは手始めにドットインストールの手順に従ってみたいと思います。
- Docker on Macのページにも学習用のチュートリアルが存在するが、こちらはドットインストール『Docker入門』終了後に試す方向で。
学習記録
#01 Dockerとはなにか?
講座#01では以下の内容について言及しています。
- Dockerについての非常に簡潔な紹介。
- 必要な知識や作業を進める環境に関する説明。
#02 Ubuntuを用意しよう
講座#02では以下の内容について言及しています。
- Ubuntu環境の用意と接続確認
#02 実践内容
Vagrant by HashiCorpにアクセスし、Vargantのインストーラを入手。バージョンは1.9.1(vagrant_1.9.1.dmg)。入手後に起動&インストール作業実施。

バージョン確認及びヘルプメニュー確認。
$ vagrant help
(ヘルプ内容が表示されている事を確認)
$ vagrant --version
Vagrant 1.9.1
下記サイトにアクセスし、必要となるUbuntu環境のVargantの標準テンプレート(base boxesと呼ぶらしい)のURLを入手。ドットインストールでは14.04を用いていたがここではせっかくなので新しめのUbuntu16.04のものを使うことにしてみます。
以下のものだと新しめ且つDockerが有効となっているのでちょうど良さそうです。
Ubuntu 16.04 with Docker enabled (based on amd64 server iso file)
https://github.com/jose-lpa/packer-ubuntu_lts/releases/download/v3.1/ubuntu-16.04.box
vagrant box addでboxを追加。
$ vagrant box add ubuntu1604_docker_enabled https://github.com/jose-lpa/packer-ubuntu_lts/releases/download/v3.1/ubuntu-16.04.box
==> box: Box file was not detected as metadata. Adding it directly...
==> box: Adding box 'ubuntu1604_docker_enabled' (v0) for provider:
    box: Downloading: https://github.com/jose-lpa/packer-ubuntu_lts/releases/download/v3.1/ubuntu-16.04.box
==> box: Successfully added box 'ubuntu1604_docker_enabled' (v0) for 'virtualbox'!
専用のディレクトリを設け、そこで初期化を実施。併せて環境のIPアドレス設定も行います。
$ pwd
/Users/shinyaa31/Vagrant
$ mkdir Vagrant
$ cd Vagrant/
$ mkdir Docker
$ cd Docker/
$ vagrant init ubuntu1604_docker_enabled
A `Vagrantfile` has been placed in this directory. You are now
ready to `vagrant up` your first virtual environment! Please read
the comments in the Vagrantfile as well as documentation on
`vagrantup.com` for more information on using Vagrant.
$ ls
Vagrantfile
$ vi Vagrantfile
  # Create a private network, which allows host-only access to the machine
  # using a specific IP.
  # config.vm.network "private_network", ip: "192.168.33.10"
  config.vm.network "private_network", ip: "192.168.11.22"
環境Up。何か怒られた。この時はVirtual Boxが当該環境では必要となる事を把握しておりませんでした。
$ vagrant up
:
Vagrant relies on interactions with 3rd party systems, known as
"providers", to provide Vagrant with resources to run development
environments. Examples are VirtualBox, VMware, Hyper-V.
:
The easiest solution to this message is to install VirtualBox, which
is available for free on all major platforms.
という事でVirtual Boxをインストール。
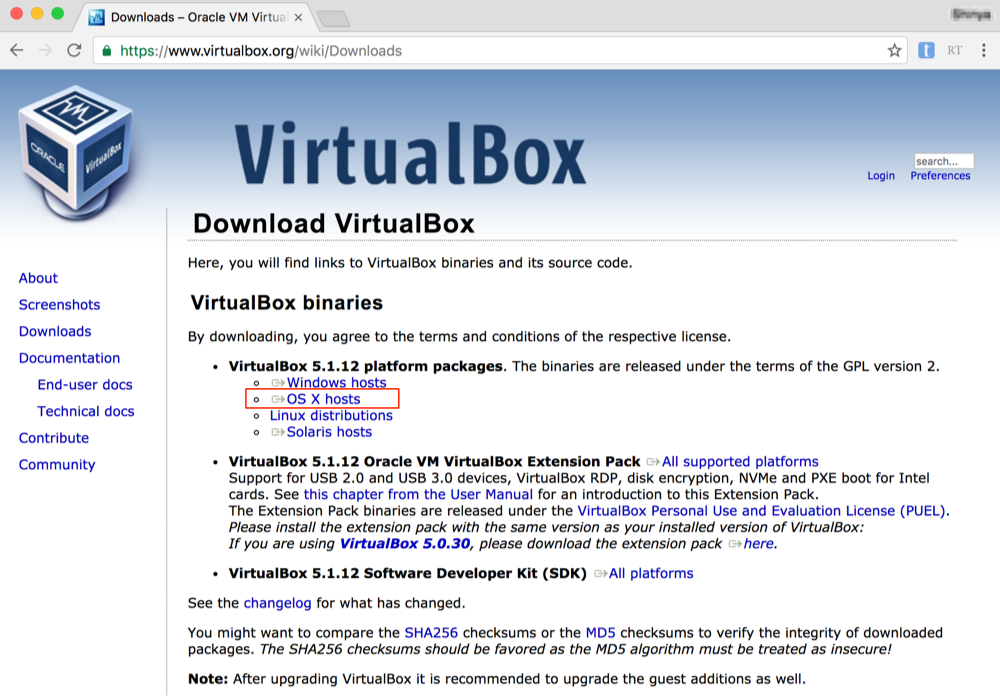
インストール完了後、環境作成は行わずそのままで。
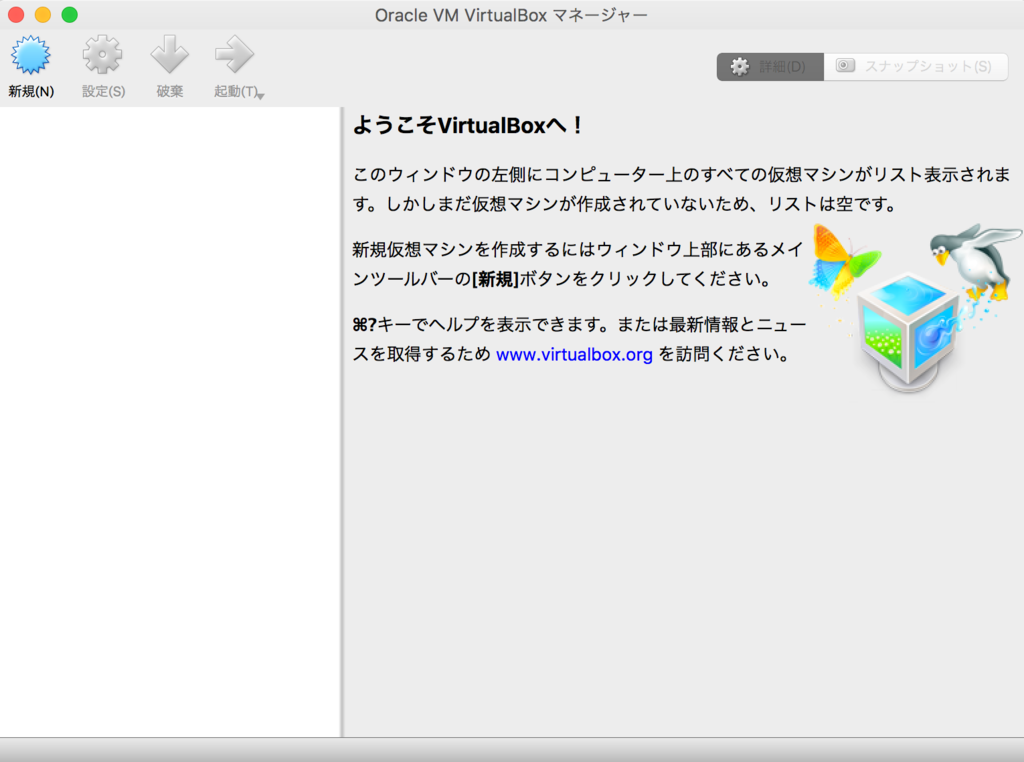
vagrant up再実行。まだ怒られます。
$ vagrant up
Bringing machine 'default' up with 'virtualbox' provider...
==> default: Importing base box 'ubuntu1604_docker_enabled'...
==> default: Matching MAC address for NAT networking...
==> default: Setting the name of the VM: Docker_default_1483374501136_97041
==> default: Clearing any previously set network interfaces...
The specified host network collides with a non-hostonly network!
This will cause your specified IP to be inaccessible. Please change
the IP or name of your host only network so that it no longer matches that of
a bridged or non-hostonly network.
$
エラーメッセージを調べてみると、IPアドレスの設定がおかしいらしい。確かに衝突するIPアドレスを設定していました。設定ファイルを衝突しないIPアドレス体系のものに変更します。
  # config.vm.network "private_network", ip: "192.168.33.10"
  config.vm.network "private_network", ip: "192.168.99.88"
再々実行。しかし以下のメッセージが延々出続けています。
default: Warning: Remote connection disconnect. Retrying...
どうやらこの辺が怪しいらしいぞ。試してみますかね...
...と思ったら何か上手いこと終わってた。アレ?バージョンが新しくなって改善されたのかな。それとも一定時間掛かるものなのかこれは。
$ vagrant up
Bringing machine 'default' up with 'virtualbox' provider...
==> default: Clearing any previously set network interfaces...
==> default: Preparing network interfaces based on configuration...
    default: Adapter 1: nat
    default: Adapter 2: hostonly
==> default: Forwarding ports...
    default: 22 (guest) => 2222 (host) (adapter 1)
==> default: Booting VM...
==> default: Waiting for machine to boot. This may take a few minutes...
    default: SSH address: 127.0.0.1:2222
    default: SSH username: vagrant
    default: SSH auth method: private key
    default: Warning: Remote connection disconnect. Retrying...
    default: Warning: Remote connection disconnect. Retrying...
    default: Warning: Remote connection disconnect. Retrying...
    default: Warning: Remote connection disconnect. Retrying...
    default: Warning: Remote connection disconnect. Retrying...
    default: Warning: Remote connection disconnect. Retrying...
    default: Warning: Remote connection disconnect. Retrying...
    default: Warning: Remote connection disconnect. Retrying...
    default:
    default: Vagrant insecure key detected. Vagrant will automatically replace
    default: this with a newly generated keypair for better security.
    default:
    default: Inserting generated public key within guest...
    default: Removing insecure key from the guest if it's present...
    default: Key inserted! Disconnecting and reconnecting using new SSH key...
==> default: Machine booted and ready!
==> default: Checking for guest additions in VM...
==> default: Configuring and enabling network interfaces...
==> default: Mounting shared folders...
    default: /vagrant => /Users/shinyaa31/Vagrant/Docker
$
vagrant sshでログインを試みます。ログイン出来ました!以下の様な構成及びストレージ容量の環境となっている様です。
$ vagrant ssh
Welcome to Ubuntu 16.04.1 LTS (GNU/Linux 4.4.0-57-generic x86_64)
 * Documentation:  https://help.ubuntu.com
 * Management:     https://landscape.canonical.com
 * Support:        https://ubuntu.com/advantage
vagrant@ubuntu:~$
vagrant@ubuntu:~$ df -h
Filesystem      Size  Used Avail Use% Mounted on
udev            480M     0  480M   0% /dev
tmpfs           100M  1.8M   98M   2% /run
/dev/sda3        18G  1.5G   16G   9% /
tmpfs           497M     0  497M   0% /dev/shm
tmpfs           5.0M     0  5.0M   0% /run/lock
tmpfs           497M     0  497M   0% /sys/fs/cgroup
/dev/sda1       180M   91M   76M  55% /boot
vagrant         465G   40G  426G   9% /vagrant
vagrant@ubuntu:~$
VirtualBox上でも以下の様な形で構成を確認する事が出来ています。
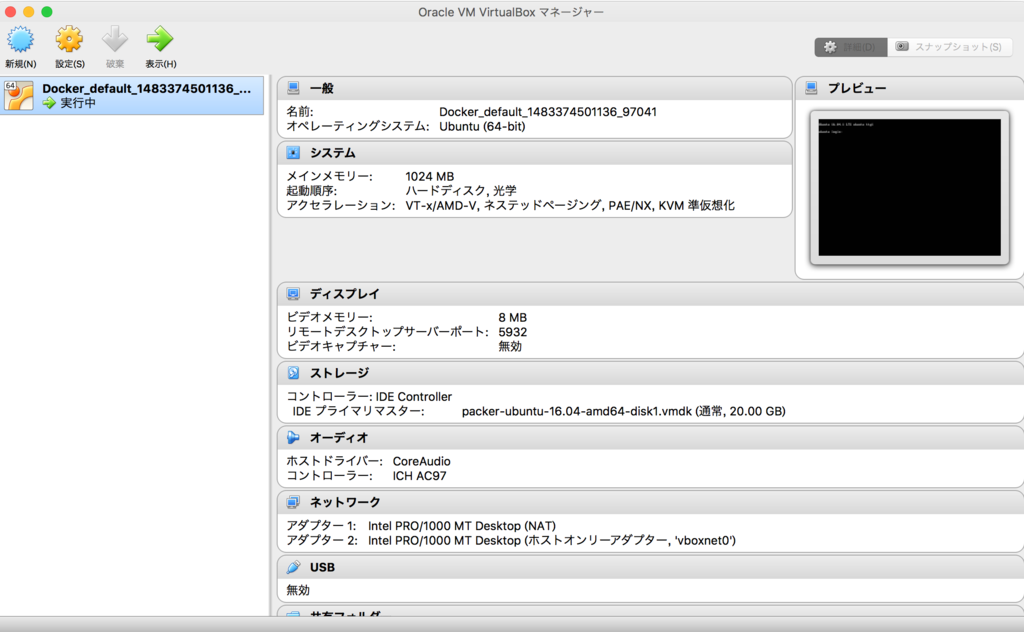
#03 Dockerをインストールしよう
講座#03では以下の内容について言及しています。
- 構築したVagrantの環境にDockerをapt-getコマンドにてインストール。
#03 実践内容
講座では下記のコマンドで群でインストールと設定を行っていますが、
$ sudo apt-get update
$ sudo apt-get install docker.io
$ sudo ln -sf /usr/bin/docker.io /usr/local/bin/docker
今回用意した環境では既にDockerが有効となっている為、上記コマンドを実行せずとも既に導入がなされています。バージョン確認のコマンドによるとv1.12.5が入っているようです。
vagrant@ubuntu:~$ sudo docker --version
Docker version 1.12.5, build 7392c3b
#04 作業の流れと用語を理解しよう
講座#04では以下の内容について言及しています。
- Dockerの用語解説、流れをイメージにて説明
#04 実践内容
基本的なDockerのコマンドについて把握。
docker pull:Docker Hubレジストリにある構築済みイメージの取得 (詳細)docker commit:コンテナのファイル変更や設定を、新しいイメージに収容 (詳細)docker run:指定されたイメージ上に書き込み可能なコンテナ・レイヤを作成&開始 (詳細)docker push:イメージを Docker Hub レジストリや、自分で作成したレジストリで共有 (詳細)
以上コマンドを活用する事で、作成した環境を別の環境で活用する事が可能となります。(docker indexから docker pull & docker run)
#05 Imageを操作してみよう
講座#05では以下の内容について言及しています。
- 引き続きdockerコマンド各種についての紹介。Dockerコンテナ内部でのコマンドについて解説。
#05 実践内容
講座で紹介されていた https://index.docker.io は現時点では下記URLのDocker Hubにリダイレクトするようになっています。
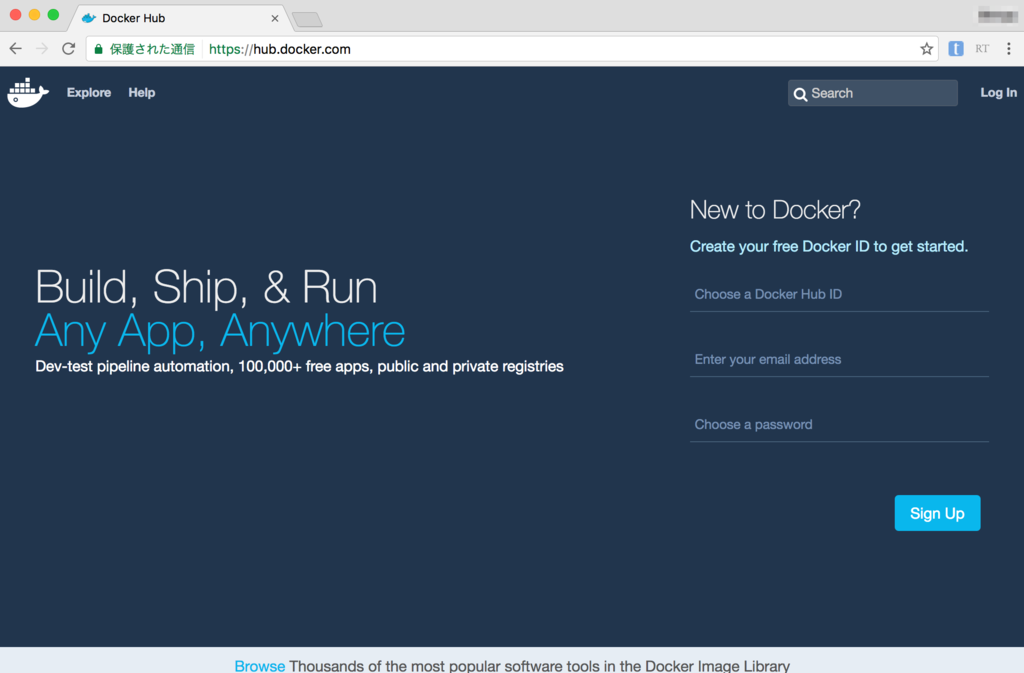
docker search ( Docker Hub上のイメージを検索 )
vagrant@ubuntu:~$ sudo docker search centos
NAME                                   DESCRIPTION                                     STARS     OFFICIAL   AUTOMATED
centos                                 The official build of CentOS.                   2981      [OK]
jdeathe/centos-ssh                     CentOS-6 6.8 x86_64 / CentOS-7 7.3.1611 x8...   54                   [OK]
nimmis/java-centos                     This is docker images of CentOS 7 with dif...   20                   [OK]
consol/centos-xfce-vnc                 Centos container with "headless" VNC sessi...   17                   [OK]
million12/centos-supervisor            Base CentOS-7 with supervisord launcher, h...   12                   [OK]
torusware/speedus-centos               Always updated official CentOS docker imag...   8                    [OK]
egyptianbman/docker-centos-nginx-php   A simple and highly configurable docker co...   6                    [OK]
nathonfowlie/centos-jre                Latest CentOS image with the JRE pre-insta...   5                    [OK]
centos/mariadb55-centos7                                                               3                    [OK]
centos/tools                           Docker image that has systems administrati...   2                    [OK]
harisekhon/centos-java                 Java on CentOS (OpenJDK, tags jre/jdk7-8)       2                    [OK]
harisekhon/centos-scala                Scala + CentOS (OpenJDK tags 2.10-jre7 - 2...   1                    [OK]
centos/redis                           Redis built for CentOS                          1                    [OK]
blacklabelops/centos                   CentOS Base Image! Built and Updates Daily!     1                    [OK]
darksheer/centos                       Base Centos Image -- Updated hourly             1                    [OK]
timhughes/centos                       Centos with systemd installed and running       1                    [OK]
repositoryjp/centos                    Docker Image for CentOS.                        0                    [OK]
wenjianzhou/centos                     centos                                          0                    [OK]
januswel/centos                        yum update-ed CentOS image                      0                    [OK]
vcatechnology/centos                   A CentOS Image which is updated daily           0                    [OK]
grayzone/centos                        auto build for centos.                          0                    [OK]
ustclug/centos                          USTC centos                                    0                    [OK]
grossws/centos                         CentOS 6 and 7 base images with gosu and l...   0                    [OK]
smartentry/centos                      centos with smartentry                          0                    [OK]
kz8s/centos                            Official CentOS plus epel-release               0                    [OK]
vagrant@ubuntu:~$
docker pull (イメージの取得)
$ sudo docker pull centos
Using default tag: latest
latest: Pulling from library/centos
45a2e645736c: Pull complete
Digest: sha256:c577af3197aacedf79c5a204cd7f493c8e07ffbce7f88f7600bf19c688c38799
Status: Downloaded newer image for centos:latest
$
docker images (取得済みイメージ一覧の確認)
$ sudo docker images
REPOSITORY          TAG                 IMAGE ID            CREATED             SIZE
centos              latest              67591570dd29        3 weeks ago         191.8 MB
docker inspect (取得イメージの詳細内容確認)
vagrant@ubuntu:~$ sudo docker inspect centos:latest
[
    {
        "Id": "sha256:67591570dd29de0e124ee89d50458b098dbd83b12d73e5fdaf8b4dcbd4ea50f8",
        "RepoTags": [
            "centos:latest"
        ],
        "RepoDigests": [
            "centos@sha256:c577af3197aacedf79c5a204cd7f493c8e07ffbce7f88f7600bf19c688c38799"
        ],
        "Parent": "",
        "Comment": "",
        "Created": "2016-12-15T18:21:23.875991987Z",
        "Container": "779bf0c18c57d46c6388f6170e5460248b71e6e2f4401e7344e4cb1da8138251",
        "ContainerConfig": {
            "Hostname": "1b0d6163fdc2",
            "Domainname": "",
            "User": "",
            "AttachStdin": false,
            "AttachStdout": false,
            "AttachStderr": false,
            "Tty": false,
            "OpenStdin": false,
            "StdinOnce": false,
            "Env": [
                "PATH=/usr/local/sbin:/usr/local/bin:/usr/sbin:/usr/bin:/sbin:/bin"
            ],
            "Cmd": [
                "/bin/sh",
                "-c",
                "#(nop) ",
                "CMD [\"/bin/bash\"]"
            ],
            "Image": "sha256:e48874078389760e563a915f3f1fd8cc0cd1c476d6536e6d692ba7a79120d913",
            "Volumes": null,
            "WorkingDir": "",
            "Entrypoint": null,
            "OnBuild": null,
            "Labels": {
                "build-date": "20161214",
                "license": "GPLv2",
                "name": "CentOS Base Image",
                "vendor": "CentOS"
            }
        },
        "DockerVersion": "1.12.1",
        "Author": "https://github.com/CentOS/sig-cloud-instance-images",
        "Config": {
            "Hostname": "1b0d6163fdc2",
            "Domainname": "",
            "User": "",
            "AttachStdin": false,
            "AttachStdout": false,
            "AttachStderr": false,
            "Tty": false,
            "OpenStdin": false,
            "StdinOnce": false,
            "Env": [
                "PATH=/usr/local/sbin:/usr/local/bin:/usr/sbin:/usr/bin:/sbin:/bin"
            ],
            "Cmd": [
                "/bin/bash"
            ],
            "Image": "sha256:e48874078389760e563a915f3f1fd8cc0cd1c476d6536e6d692ba7a79120d913",
            "Volumes": null,
            "WorkingDir": "",
            "Entrypoint": null,
            "OnBuild": null,
            "Labels": {
                "build-date": "20161214",
                "license": "GPLv2",
                "name": "CentOS Base Image",
                "vendor": "CentOS"
            }
        },
        "Architecture": "amd64",
        "Os": "linux",
        "Size": 191846488,
        "VirtualSize": 191846488,
        "GraphDriver": {
            "Name": "aufs",
            "Data": null
        },
        "RootFS": {
            "Type": "layers",
            "Layers": [
                "sha256:34e7b85d83e48a22bd5dfa2b6b9ee9565b7ef672f09b3d2409c61635f9bca4db"
            ]
        }
    }
]
vagrant@ubuntu:~$
docker rmi (取得イメージの削除)
vagrant@ubuntu:~$ sudo docker rmi centos
Untagged: centos:latest
Untagged: centos@sha256:c577af3197aacedf79c5a204cd7f493c8e07ffbce7f88f7600bf19c688c38799
Deleted: sha256:67591570dd29de0e124ee89d50458b098dbd83b12d73e5fdaf8b4dcbd4ea50f8
Deleted: sha256:34e7b85d83e48a22bd5dfa2b6b9ee9565b7ef672f09b3d2409c61635f9bca4db
vagrant@ubuntu:~$ sudo docker images
REPOSITORY          TAG                 IMAGE ID            CREATED             SIZE
#06 Containerを操作してみよう
講座#06では以下の内容について言及しています。
- Dockerコンテナ内部でのコマンドについて解説。の続き。
#06 実践内容
上記で削除してしまったコンテナを再取得。
vagrant@ubuntu:~$ sudo docker pull centos
Using default tag: latest
latest: Pulling from library/centos
45a2e645736c: Pull complete
Digest: sha256:c577af3197aacedf79c5a204cd7f493c8e07ffbce7f88f7600bf19c688c38799
Status: Downloaded newer image for centos:latest
vagrant@ubuntu:~$ sudo docker images
REPOSITORY          TAG                 IMAGE ID            CREATED             SIZE
centos              latest              67591570dd29        3 weeks ago         191.8 MB
vagrant@ubuntu:~$
dockerコンテナの実行と実行結果の確認、コンテナの削除まで。
docker run(コンテナの実行)
docker run:コンテナの実行 (詳細)
vagrant@ubuntu:~$ sudo docker run centos:latest echo "hello docker world"
hello docker world
docker ps(実行中コンテナの表示)
docker ps:実行中コンテナの表示 (詳細)-aオプションを付けると"全てのコンテナを表示"可能。
vagrant@ubuntu:~$ sudo docker ps
CONTAINER ID        IMAGE               COMMAND             CREATED             STATUS              PORTS               NAMES
vagrant@ubuntu:~$ sudo docker ps -a
CONTAINER ID        IMAGE               COMMAND                  CREATED             STATUS                     PORTS               NAMES
fcd1cc2ec388        centos:latest       "echo 'hello docker w"   2 minutes ago       Exited (0) 2 minutes ago                       evil_euler
docker rm(コンテナの削除)
docker rm:コンテナの削除 (詳細)
vagrant@ubuntu:~$ sudo docker rm fcd
fcd
vagrant@ubuntu:~$ sudo docker ps -a
CONTAINER ID        IMAGE               COMMAND             CREATED             STATUS              PORTS               NAMES
vagrant@ubuntu:~$
#07 実行中のContainerを操作しよう
講座#07では以下の内容について言及しています。
- 実行中のコンテナ内での各種操作
#07 実践内容
バックグラウンドで実行(-dオプションを付与)
以下の形で-dオプションを付与するとバックグラウンドで実行が可能となる。
vagrant@ubuntu:~$ sudo docker run -d centos free -s 3
4be1ef225fb7fb56b874e66abb7db2490c5a3a44d6f49524cfa8c3541c4ae55c
vagrant@ubuntu:~$ sudo docker ps
CONTAINER ID        IMAGE               COMMAND             CREATED             STATUS              PORTS               NAMES
4be1ef225fb7        centos              "free -s 3"         27 seconds ago      Up 26 seconds                           kickass_minsky
ログ内容の確認
vagrant@ubuntu:~$ sudo docker logs 4be
              total        used        free      shared  buff/cache   available
Mem:        1016164       61344      514496        3532      440324      794156
Swap:             0           0           0
              total        used        free      shared  buff/cache   available
Mem:        1016164       53748      522072        3528      440344      801772
Swap:             0           0           0
              total        used        free      shared  buff/cache   available
Mem:        1016164       53748      522072        3528      440344      801772
Swap:             0           0           0
:
:
docker attach(実行中のコンテナにアタッチ)
- attach — Docker-docs-ja 1.12.RC ドキュメント
--sig-proxy=falseはおまじない的なものとして必要。指定すると、attach 後 Ctrl+C で抜けてもコンテナは実行を続ける。(※参照)- ctrl+cでキャンセル可能。
vagrant@ubuntu:~$ sudo docker attach --sig-proxy=false 4be
              total        used        free      shared  buff/cache   available
Mem:        1016164       57672      517976        3528      440516      797840
Swap:             0           0           0
              total        used        free      shared  buff/cache   available
Mem:        1016164       57688      517960        3528      440516      797824
Swap:             0           0           0
              total        used        free      shared  buff/cache   available
Mem:        1016164       57680      517960        3528      440524      797824
Swap:             0           0           0
^C
docker stop/docker kill(実行中のコンテナを停止)
vagrant@ubuntu:~$ sudo docker kill 4be
4be
vagrant@ubuntu:~$ sudo docker ps
CONTAINER ID        IMAGE               COMMAND             CREATED             STATUS              PORTS               NAMES
vagrant@ubuntu:~$ sudo docker ps -a
CONTAINER ID        IMAGE               COMMAND             CREATED             STATUS                        PORTS               NAMES
4be1ef225fb7        centos              "free -s 3"         2 minutes ago       Exited (137) 11 seconds ago                       kickass_minsky
docker start(コンテナを起動)
vagrant@ubuntu:~$ sudo docker start 4be
4be
vagrant@ubuntu:~$ sudo docker ps
CONTAINER ID        IMAGE               COMMAND             CREATED             STATUS              PORTS               NAMES
4be1ef225fb7        centos              "free -s 3"         2 minutes ago       Up 2 seconds                            kickass_minsky
vagrant@ubuntu:~$
#08 ContainerからImageを作ってみよう
講座#08では以下の内容について言及しています。
- 実行中のコンテナ内でイメージ作成
#08 実践内容
docker runでは、以下のオプションを付けて実行する事が可能となっている。
-i:インタラクティブモードで起動-t:ターミナル起動- Docker run リファレンス — Docker-docs-ja 1.12.RC ドキュメント
シンプルな検証としてテキストファイルを配置。
vagrant@ubuntu:~$ sudo docker run -i -t centos /bin/bash
[root@de44ce5f623f /]# touch hello-docker.txt
[root@de44ce5f623f /]# ls
anaconda-post.log  etc               lib         media  proc  sbin  tmp
bin                hello-docker.txt  lib64       mnt    root  srv   usr
dev                home              lost+found  opt    run   sys   var
[root@de44ce5f623f /]# exit
exit
vagrant@ubuntu:~$ sudo docker ps -a
CONTAINER ID        IMAGE               COMMAND             CREATED              STATUS                      PORTS               NAMES
de44ce5f623f        centos              "/bin/bash"         About a minute ago   Exited (0) 25 seconds ago                       amazing_bose
vagrant@ubuntu:~$
docker commit(コンテナのコミット)
イメージの名称付けには『ユーザー名/任意名称』という慣習があるとの事。これに倣って『shinyaa31/hello』と付けてみる。
vagrant@ubuntu:~$ sudo docker commit de4 shinyaa31/hello
sha256:6af22b4e847281ee5a44cb3e47789bdab366e9fb6090bfb045fbc62f864de939
作成完了。別のイメージが出来ている。
vagrant@ubuntu:~$ sudo docker images
REPOSITORY          TAG                 IMAGE ID            CREATED             SIZE
shinyaa31/hello     latest              6af22b4e8472        15 seconds ago      191.8 MB
centos              latest              67591570dd29        3 weeks ago         191.8 MB
上記と同様の形でdocker起動、中身を確認。作成したテキストファイルが存在している(イメージの共有・連携が出来ている)事が確認出来た。
vagrant@ubuntu:~$ sudo docker run -i -t shinyaa31/hello /bin/bash
[root@a359357e7ecf /]# ls
anaconda-post.log  dev  hello-docker.txt  lib    lost+found  mnt  proc  run   srv  tmp  var
bin                etc  home              lib64  media       opt  root  sbin  sys  usr
[root@a359357e7ecf /]#
#09 実行中のContainerを操作しよう
講座#09では以下の内容について言及しています。
- Dockerfileの作成と動作確認
#09 実践内容
『Dockerfile』というファイルを用意してdocker buildコマンドを利用する事で新しいイメージを効率的に作成する事が可能。
- Dockerfile
- build — Docker-docs-ja 1.12.RC ドキュメント
Dockerfileを作成。
vagrant@ubuntu:~$ pwd
/home/vagrant
vagrant@ubuntu:~$ vi Dockerfile
FROM centos
MAINTAINER shinyaa31 <shinyaa31@gmail.com>
# RUN: done when building.
RUN echo "Now Building..."
# CMD: done when runnning.
# CMD echo "Now Running..."
# Recommended style is below.
CMD ["echo","Now Running..."]
docker build(パスにあるソースコードから新しいイメージを構築)
ファイルを使って任意のイメージ名を指定し、build実行。カレントディレクトリのファイルを指定する為に最後にドット(.)を付与しています。途中、『Now Building...』というメッセージがecho文によって出力されている事が確認出来ます。
vagrant@ubuntu:~$ sudo docker build -t shinyaa31/echo .
Sending build context to Docker daemon 27.65 kB
Step 1 : FROM centos
 ---> 67591570dd29
Step 2 : MAINTAINER shinyaa31 <shinyaa31@gmail.com>
 ---> Running in 7dd71697ec2a
 ---> 5db08ac066fb
Removing intermediate container 7dd71697ec2a
Step 3 : RUN echo "Now Building..."
 ---> Running in 7f3fc58765ee
Now Building...
 ---> 013e85372869
Removing intermediate container 7f3fc58765ee
Step 4 : CMD echo Now Running...
 ---> Running in dcb4d2bd3b56
 ---> d9613c6c7a69
Removing intermediate container dcb4d2bd3b56
Successfully built d9613c6c7a69
vagrant@ubuntu:~$
イメージの存在及び実行の確認。
vagrant@ubuntu:~$ sudo docker images
REPOSITORY          TAG                 IMAGE ID            CREATED             SIZE
shinyaa31/echo      latest              d9613c6c7a69        47 seconds ago      191.8 MB
shinyaa31/hello     latest              6af22b4e8472        33 minutes ago      191.8 MB
centos              latest              67591570dd29        3 weeks ago         191.8 MB
vagrant@ubuntu:~$ sudo docker run shinyaa31/echo
Now Running...
vagrant@ubuntu:~$
#10 Webサーバーを立ち上げてみよう
講座#10では以下の内容について言及しています。
- Webサーバ(httpd)をインストールしたDockerイメージを構築し、実行
#10 実践内容
httpdをインストールし、設定を行うコマンドなどを踏まえた設定ファイルを作成。出来る事の一覧は公式リファレンスを参照。
FROM centos
MAINTAINER shinyaa31 <shinyaa31@gmail.com>
# RUN: done when building.
# RUN echo "Now Building..."
# CMD: done when runnning.
# CMD echo "Now Running..."
# Recommended style is below.
# CMD ["echo","Now Running..."]
RUN yum install -y httpd
ADD ./index.html /var/www/html/
EXPOSE 80
CMD ["/usr/sbin/httpd","-D","FOREGROUND"]
追加するHTMLファイルも以下のように作成。
vagrant@ubuntu:~$ vi index.html
<html>
Hello Docker World!!
</html>
build実行。途中Warningが出たりしているがひとまず完遂はした模様。
vagrant@ubuntu:~$ sudo docker build -t shinyaa31/httpd .
Sending build context to Docker daemon 29.18 kB
Step 1 : FROM centos
 ---> 67591570dd29
Step 2 : MAINTAINER shinyaa31 <shinyaa31@gmail.com>
 ---> Using cache
 ---> 5db08ac066fb
Step 3 : RUN yum install -y httpd
 ---> Running in 9b8b2e1727b5
Loaded plugins: fastestmirror, ovl
Determining fastest mirrors
 * base: ftp.iij.ad.jp
 * extras: ftp.iij.ad.jp
 * updates: ftp.iij.ad.jp
Resolving Dependencies
--> Running transaction check
---> Package httpd.x86_64 0:2.4.6-45.el7.centos will be installed
--> Processing Dependency: httpd-tools = 2.4.6-45.el7.centos for package: httpd-2.4.6-45.el7.centos.x86_64
--> Processing Dependency: system-logos >= 7.92.1-1 for package: httpd-2.4.6-45.el7.centos.x86_64
--> Processing Dependency: /etc/mime.types for package: httpd-2.4.6-45.el7.centos.x86_64
--> Processing Dependency: libaprutil-1.so.0()(64bit) for package: httpd-2.4.6-45.el7.centos.x86_64
--> Processing Dependency: libapr-1.so.0()(64bit) for package: httpd-2.4.6-45.el7.centos.x86_64
--> Running transaction check
---> Package apr.x86_64 0:1.4.8-3.el7 will be installed
---> Package apr-util.x86_64 0:1.5.2-6.el7 will be installed
---> Package centos-logos.noarch 0:70.0.6-3.el7.centos will be installed
---> Package httpd-tools.x86_64 0:2.4.6-45.el7.centos will be installed
---> Package mailcap.noarch 0:2.1.41-2.el7 will be installed
--> Finished Dependency Resolution
:
:
:
Installed:
  httpd.x86_64 0:2.4.6-45.el7.centos

Dependency Installed:
  apr.x86_64 0:1.4.8-3.el7
  apr-util.x86_64 0:1.5.2-6.el7
  centos-logos.noarch 0:70.0.6-3.el7.centos
  httpd-tools.x86_64 0:2.4.6-45.el7.centos
  mailcap.noarch 0:2.1.41-2.el7

Complete!
 ---> 919d07db48dd
Removing intermediate container 9b8b2e1727b5
Step 4 : ADD ./index.html /var/www/html/
 ---> c0dac01be111
Removing intermediate container 8fd322aa0156
Step 5 : EXPOSE 80
 ---> Running in 2d70733b770f
 ---> 335f7edd01f3
Removing intermediate container 2d70733b770f
Step 6 : CMD /usr/sbin/httpd -D FOREGROUND
 ---> Running in 4110ad3786fc
 ---> 0eeca56b99b2
Removing intermediate container 4110ad3786fc
Successfully built 0eeca56b99b2
Docker起動。起動時のオプションでポート転送も行っている。
vagrant@ubuntu:~$ sudo docker run -p 8080:80 -d shinyaa31/httpd
dee11d34434495643176dd5d5c20677ec8c6e8887151b906502545e6c340ed1c
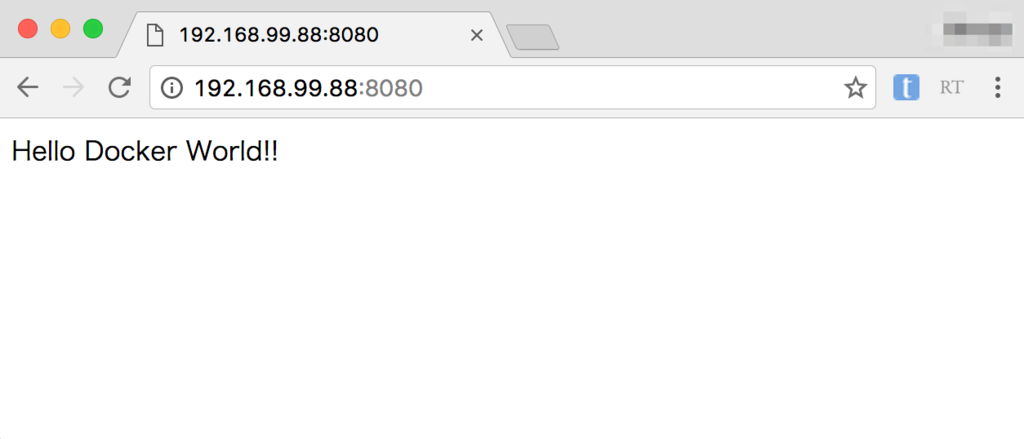
Vagrant起動時に設定したホストIP+上記docker起動で指定したポート番号でアクセス。
#11 実行中のContainerを操作しよう
講座#11では以下の内容について言及しています。
- 作成したをDockerHubに登録
#11 実践記録
DockerHubへのXXの登録を行うにはDockerHubへのユーザー登録を事前に済ませておく必要があります。サイトからユーザー登録を行い、ログイン確認まで済ませておきます。

ログインの確認まで出来たらコンソールからもログインを確認。
vagrant@ubuntu:~$ sudo docker login
Login with your Docker ID to push and pull images from Docker Hub.
If you don't have a Docker ID, head over to https://hub.docker.com to create one.
Username: shinyaa31
Password:
Login Succeeded
vagrant@ubuntu:~$
docker pushコマンド実行、DockerHubへの登録を行います。
vagrant@ubuntu:~$ sudo docker push shinyaa31/httpd
The push refers to a repository [docker.io/shinyaa31/httpd]
260e0a0e85af: Pushed
4239a8fe2e8d: Pushed
34e7b85d83e4: Mounted from library/centos
latest: digest: sha256:f8ed1ec3bc5488fe34245bca3c8f931f5c5a6db737ea56e9392ea63de89f33e2 size: 948
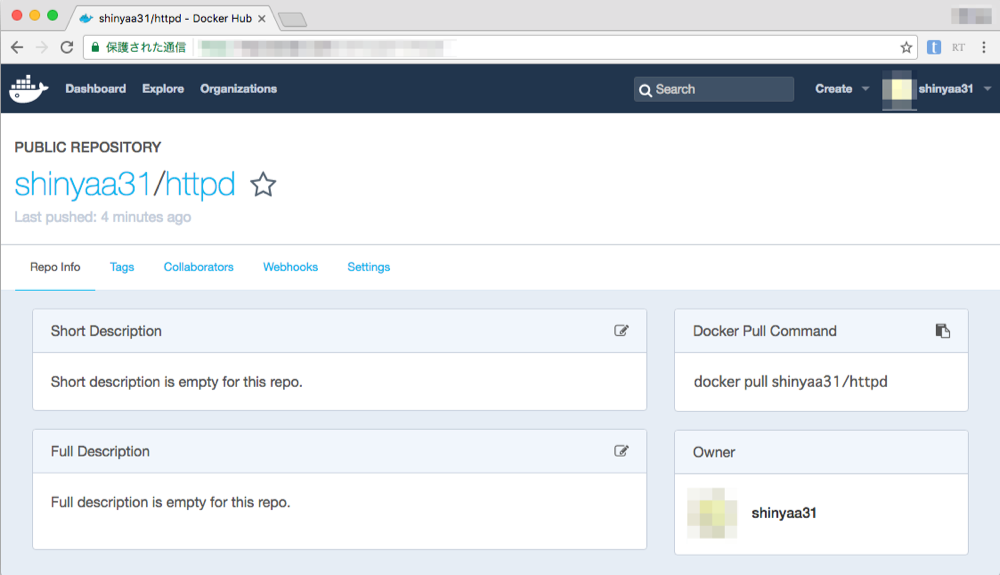
DockerHubにアクセスし、登録した内容を確認出来ました。
まとめ
以上でドットインストール『Docker入門』全11回の講座学習完了です。Docker自体は今回触るのが初めてでしたが、動画で非常に分かりやすく解説がなされており非常にスムーズに学ぶ事が出来ました。動画を眺めているだけでもトータル30分程度なので取っ掛かりの学習として選択するにはちょうど良いコンテンツだと思います。ざっくりDockerについて学ぶ事が出来たので次はDocker for Macやその他入門解説エントリ等を読み進めて理解を深めて行きたいと思います。